Hand Carved Stamp, The Relief Print
Rubber stamping is a hugely popular activity that is enjoyed by people with and without formal art training. Rubber stamps have been in use for a long time for commercial purposes and in crafts, and have been used in fine art since the DADA era. They are easy to print and provide a quick way to make multiple copies. These qualities make rubber stamping attractive for smaller scale and ephemeral art forms such as greeting cards, pins, and mail art, although many artists create large scale art works with rubber stamps or use them as accents on larger pieces. You can buy rubber stamps in just about any design or motif you can imagine, or adapt stamps that were originally made for business use. Nothing beats the creative possibilities, however, of carving your own.
Check out this 10 min video of hand carving a stamp.
(FYI: unless you want to buy stock in band aids, make sure to cut AWAY from your fingers, unlike what you may see here in this video
What you’ll need:
• A carving tool – Without a doubt the Speedball Lino Cutter is the carving tool of choice and can be found at most arts & craft stores. There are lots of other brands out there, so don’t worry if you can’t find a Speedball, just look for a Linoleum Cutter.
You can purchase all of these online at Blick Art Materials.
• Carving Material – If you’re just getting started you can practice on small plastic erasers, or purchase rubber stamping material which should be in the same section of your craft store. There are several brands out there, and you may want to try a few till you find something you like to work with. They all carve slightly different, but some are less likely to crumble.
Carving Material at Blick Art Materials.
• Ink pads – Not only will you need ink to actually use your stamp, you’ll need it to test your stamp and make sure you’ve carved away enough of the rubber surrounding your stamp.
• Obviously you’ll also need a soft pencil, some paper, and if you have an Exacto knife they can come in handy as well.
Carving
Create a simple design to start, one with simple positive and negative shapes.
The raised area will print and the carved area will not.
*** DON'T FORGET that your design will print in REVERSE.
THE STEPS:

Here are some other tutorials:
• Geninne’s Tutorial
• Inky Squid’s Flickr Tutorial
• Atlas Quest – Stamp Carving 101
• Alma Stoller Tutorial
• Inky Squid’s Flickr Tutorial
• Atlas Quest – Stamp Carving 101
• Alma Stoller Tutorial
Inspiration:
Be sure to check out the great flickr pools for inspiration as well as the many great crafters selling their stamps on etsy.
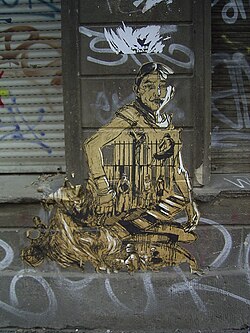
Artist of Inspiration: SWOON
Curry was born in New London, Connecticut, and raised in Daytona Beach, Florida. She moved to the Borough Park section of Brooklyn, New York when she was nineteen to study painting at the Pratt Institute.[1]Then, Curry joined groups in New York City like Grub, which provides free Dumpster-dived dinners in Brooklyn. She also founded the Toyshop collective, known for organizing events such as a march through the Lower East Side consisting of 50 people playing instruments made out of junk.[1]
 |
| A work by Swoon in Berlin |


